Overview
The New MyQ From the Chamberlain group provide piece of mind for home owners.
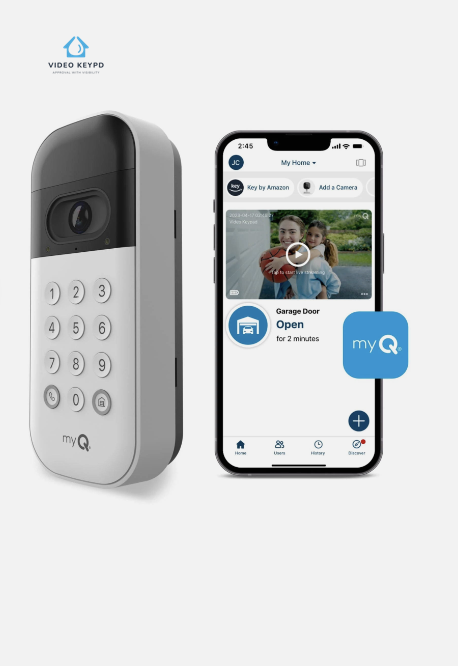
Features
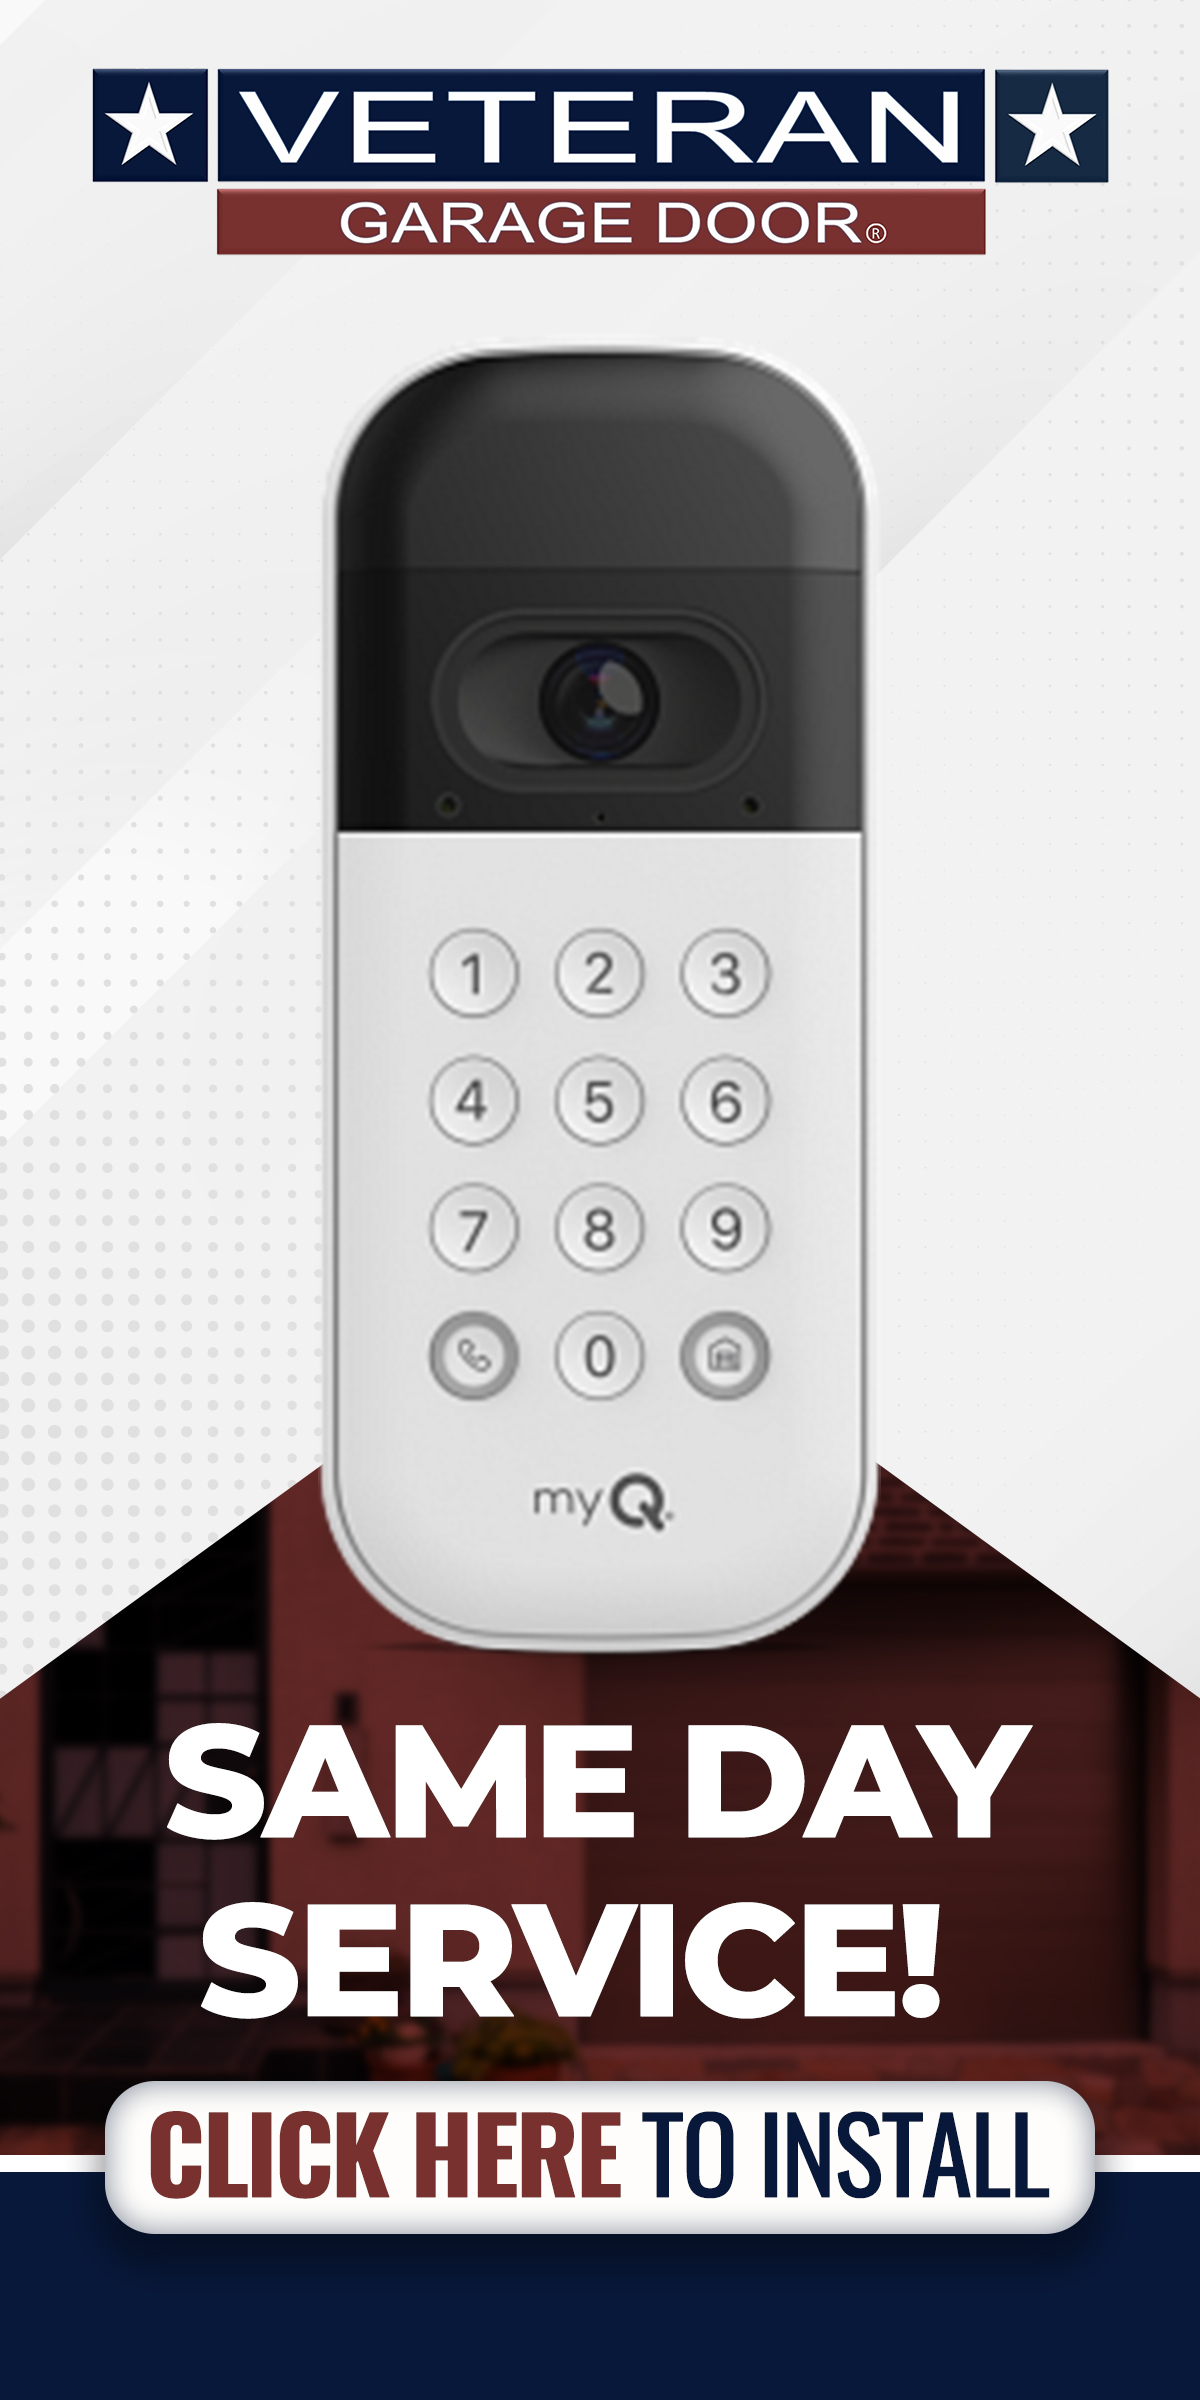
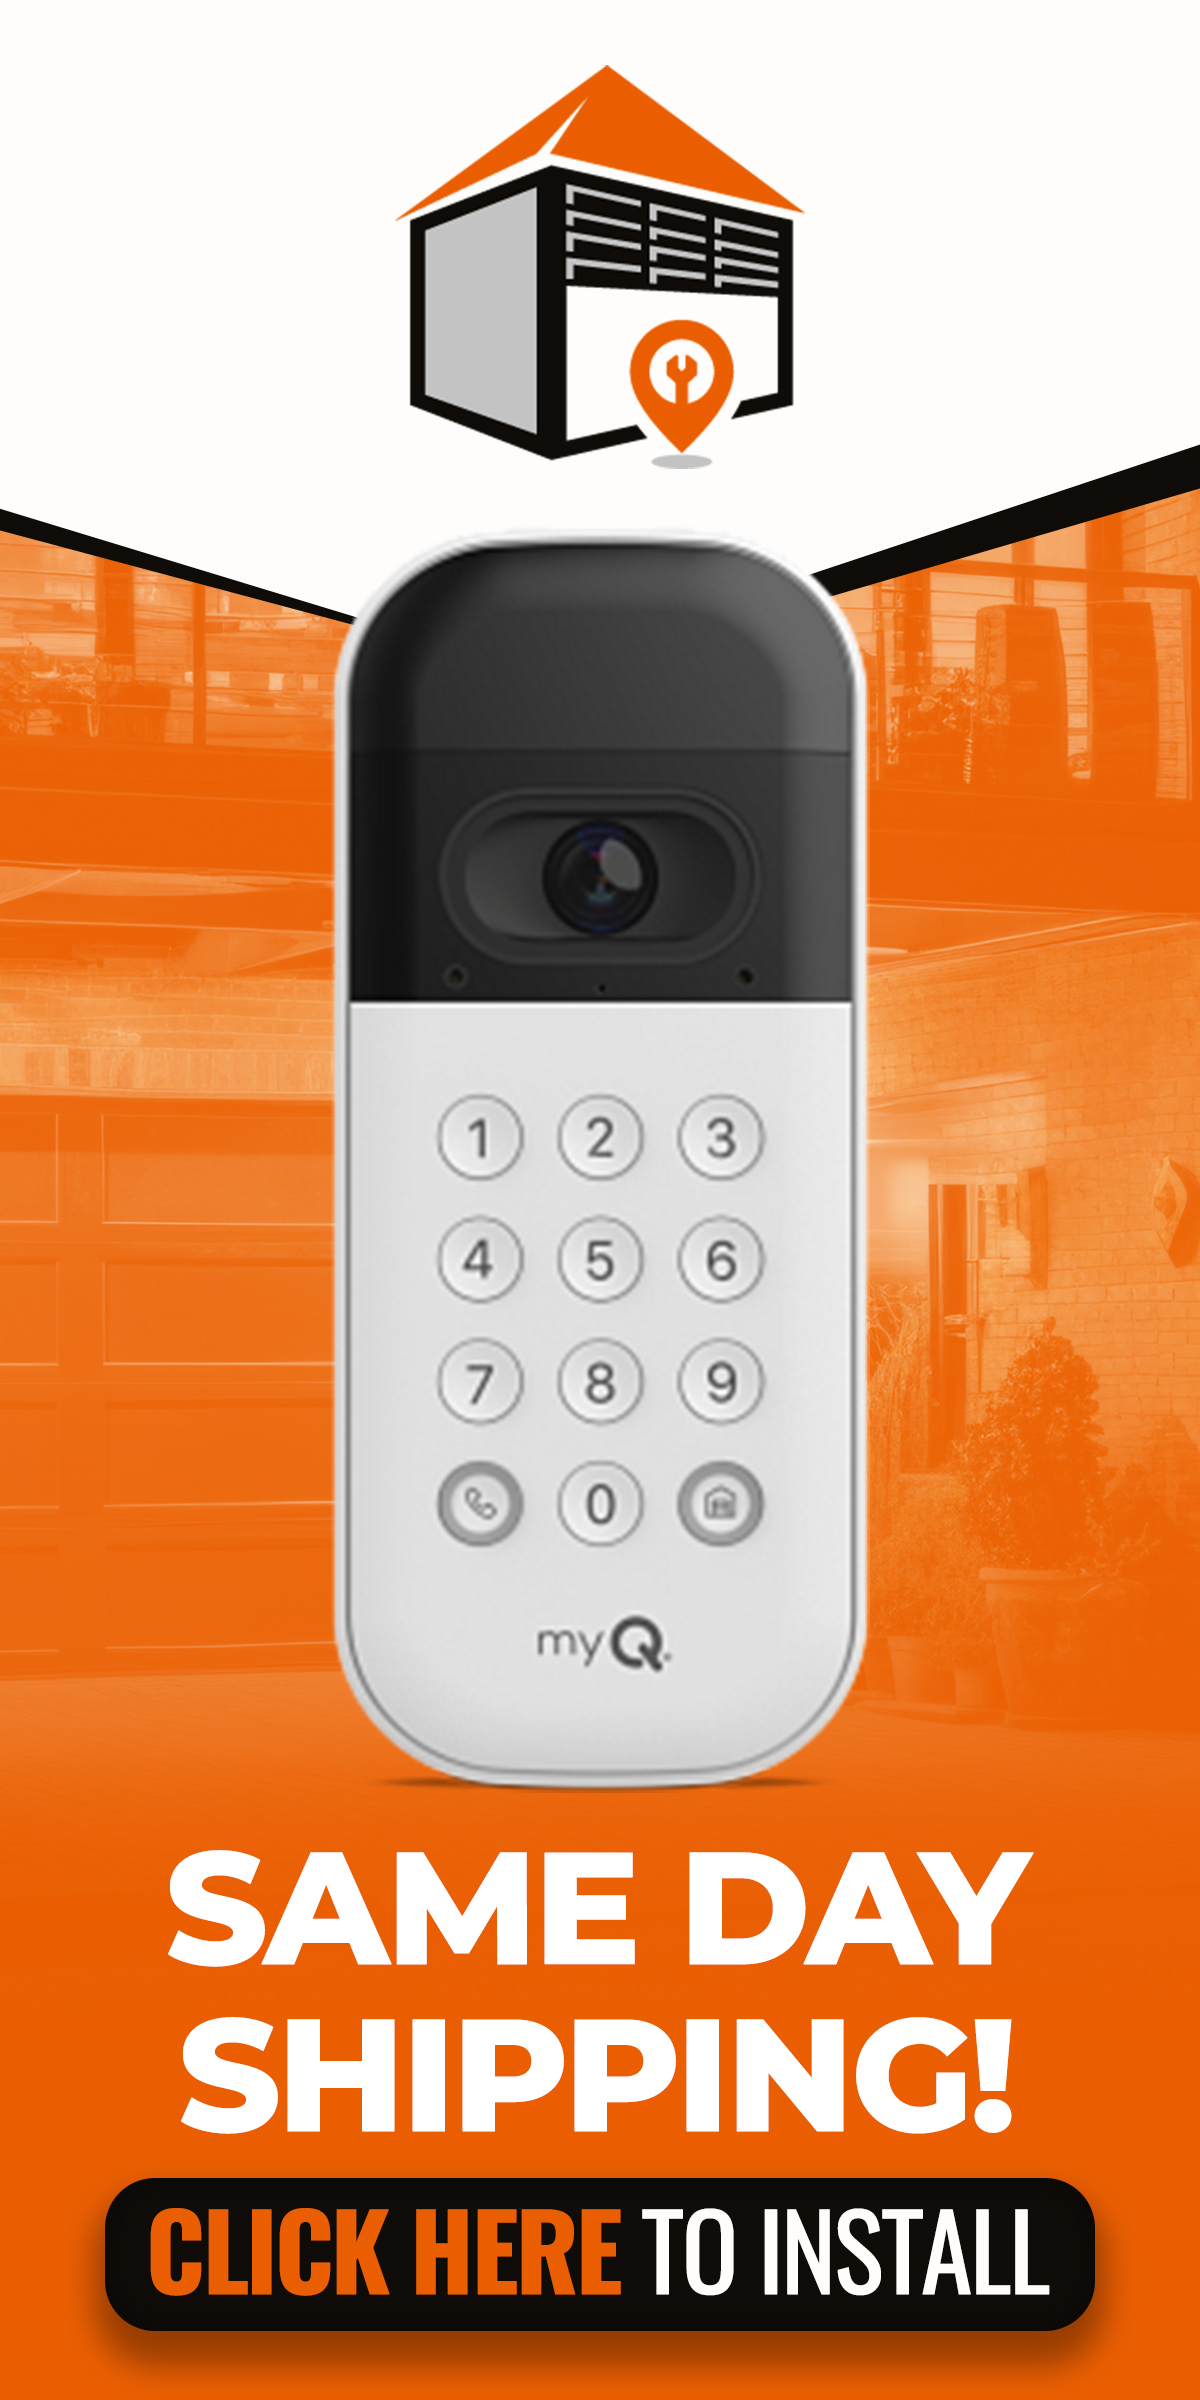
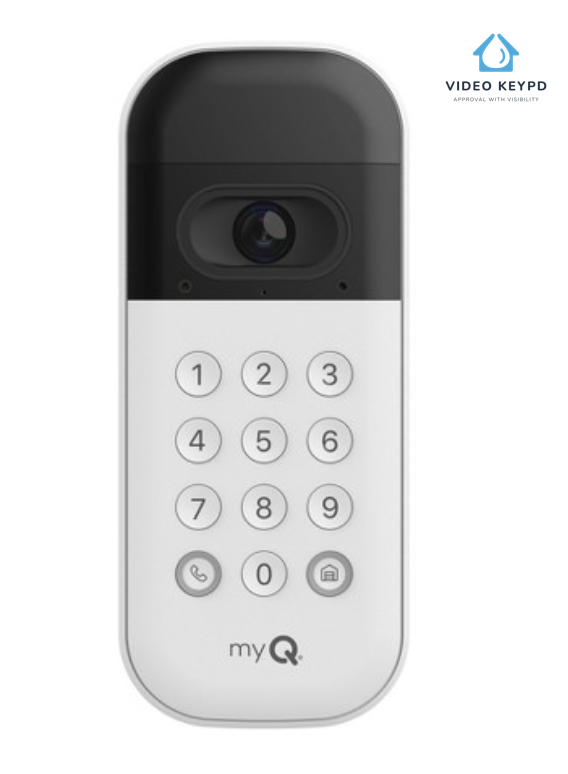
MyQ Video KeyPad Features.
-
-
Easy Programming
-
Pin Sharing Option
-
Mobile Control
Specs
MyQ Video KeyPad Specs
01
Warranty
1 Year Product Warranty
Installation Warranty depends on service provider
02
Learn Button Compatibility
Green, Orange/Red,
Purple, Yellow
03
Code Compatible
Billion code 390 MHz, Security+ 390 MHz, Security+ 315 MHz, Security+ 2.0®
Setup
Setup and Programming
Setting Up Your Video Keypad
Battery Charging Instructions
Removing and Preparing the Battery: Gently remove the back panel of your Video Keypad to access the battery. Release the battery by sliding the tab at its base upwards, then carefully take out the battery and peel off its protective covering.
Charging the Battery: Connect the battery to a USB charging source using the included cable. For optimal performance, it’s essential to fully charge the battery before first use. The battery is considered fully charged when the indicator LED shifts from red to green.
Important Note: The initial charging process may take up to 10 hours. Please plan accordingly to ensure your Video Keypad is ready for setup and use.
App Installation
Enhance your setup experience with our user-friendly mobile app. To download the app on your smartphone, you have several convenient options:
- Scan the QR Code: Use your phone’s camera to scan the second QR code found on the package insert.
- App Store Search: Navigate to your phone’s app store and search for our app.
- Website Download: Visit our website through your phone’s browser to find the app download link.
Please make sure you have your Wi-Fi password ready before starting the setup process.
Connecting Your Video Keypad
For a smooth connection of your Video Keypad, please remain close to your garage door opener during this process. Remember, do not mount the keypad just yet – that step comes later.
Here’s how to connect:
Accessing the App: Open our mobile app and tap the icon on the home screen. Then, choose ‘Device’.
Selecting Your Device: Within the app, you’ll be guided to select ‘Video Solution’, and then ‘Video Keypad’. Follow the on-screen instructions carefully to proceed.
Testing the Connection: After completing the setup in the app, it’s important to make sure your keypad is successfully connected to your garage door opener and is operational.
Here’s how verify your keypad is properly connected:
- Enter the PIN you’ve set up on your keypad.
- Press the ‘Home’ button.
- Observe if your garage door responds as intended.
This will confirm an effective connection and operation of your Video Keypad with the garage door opener.
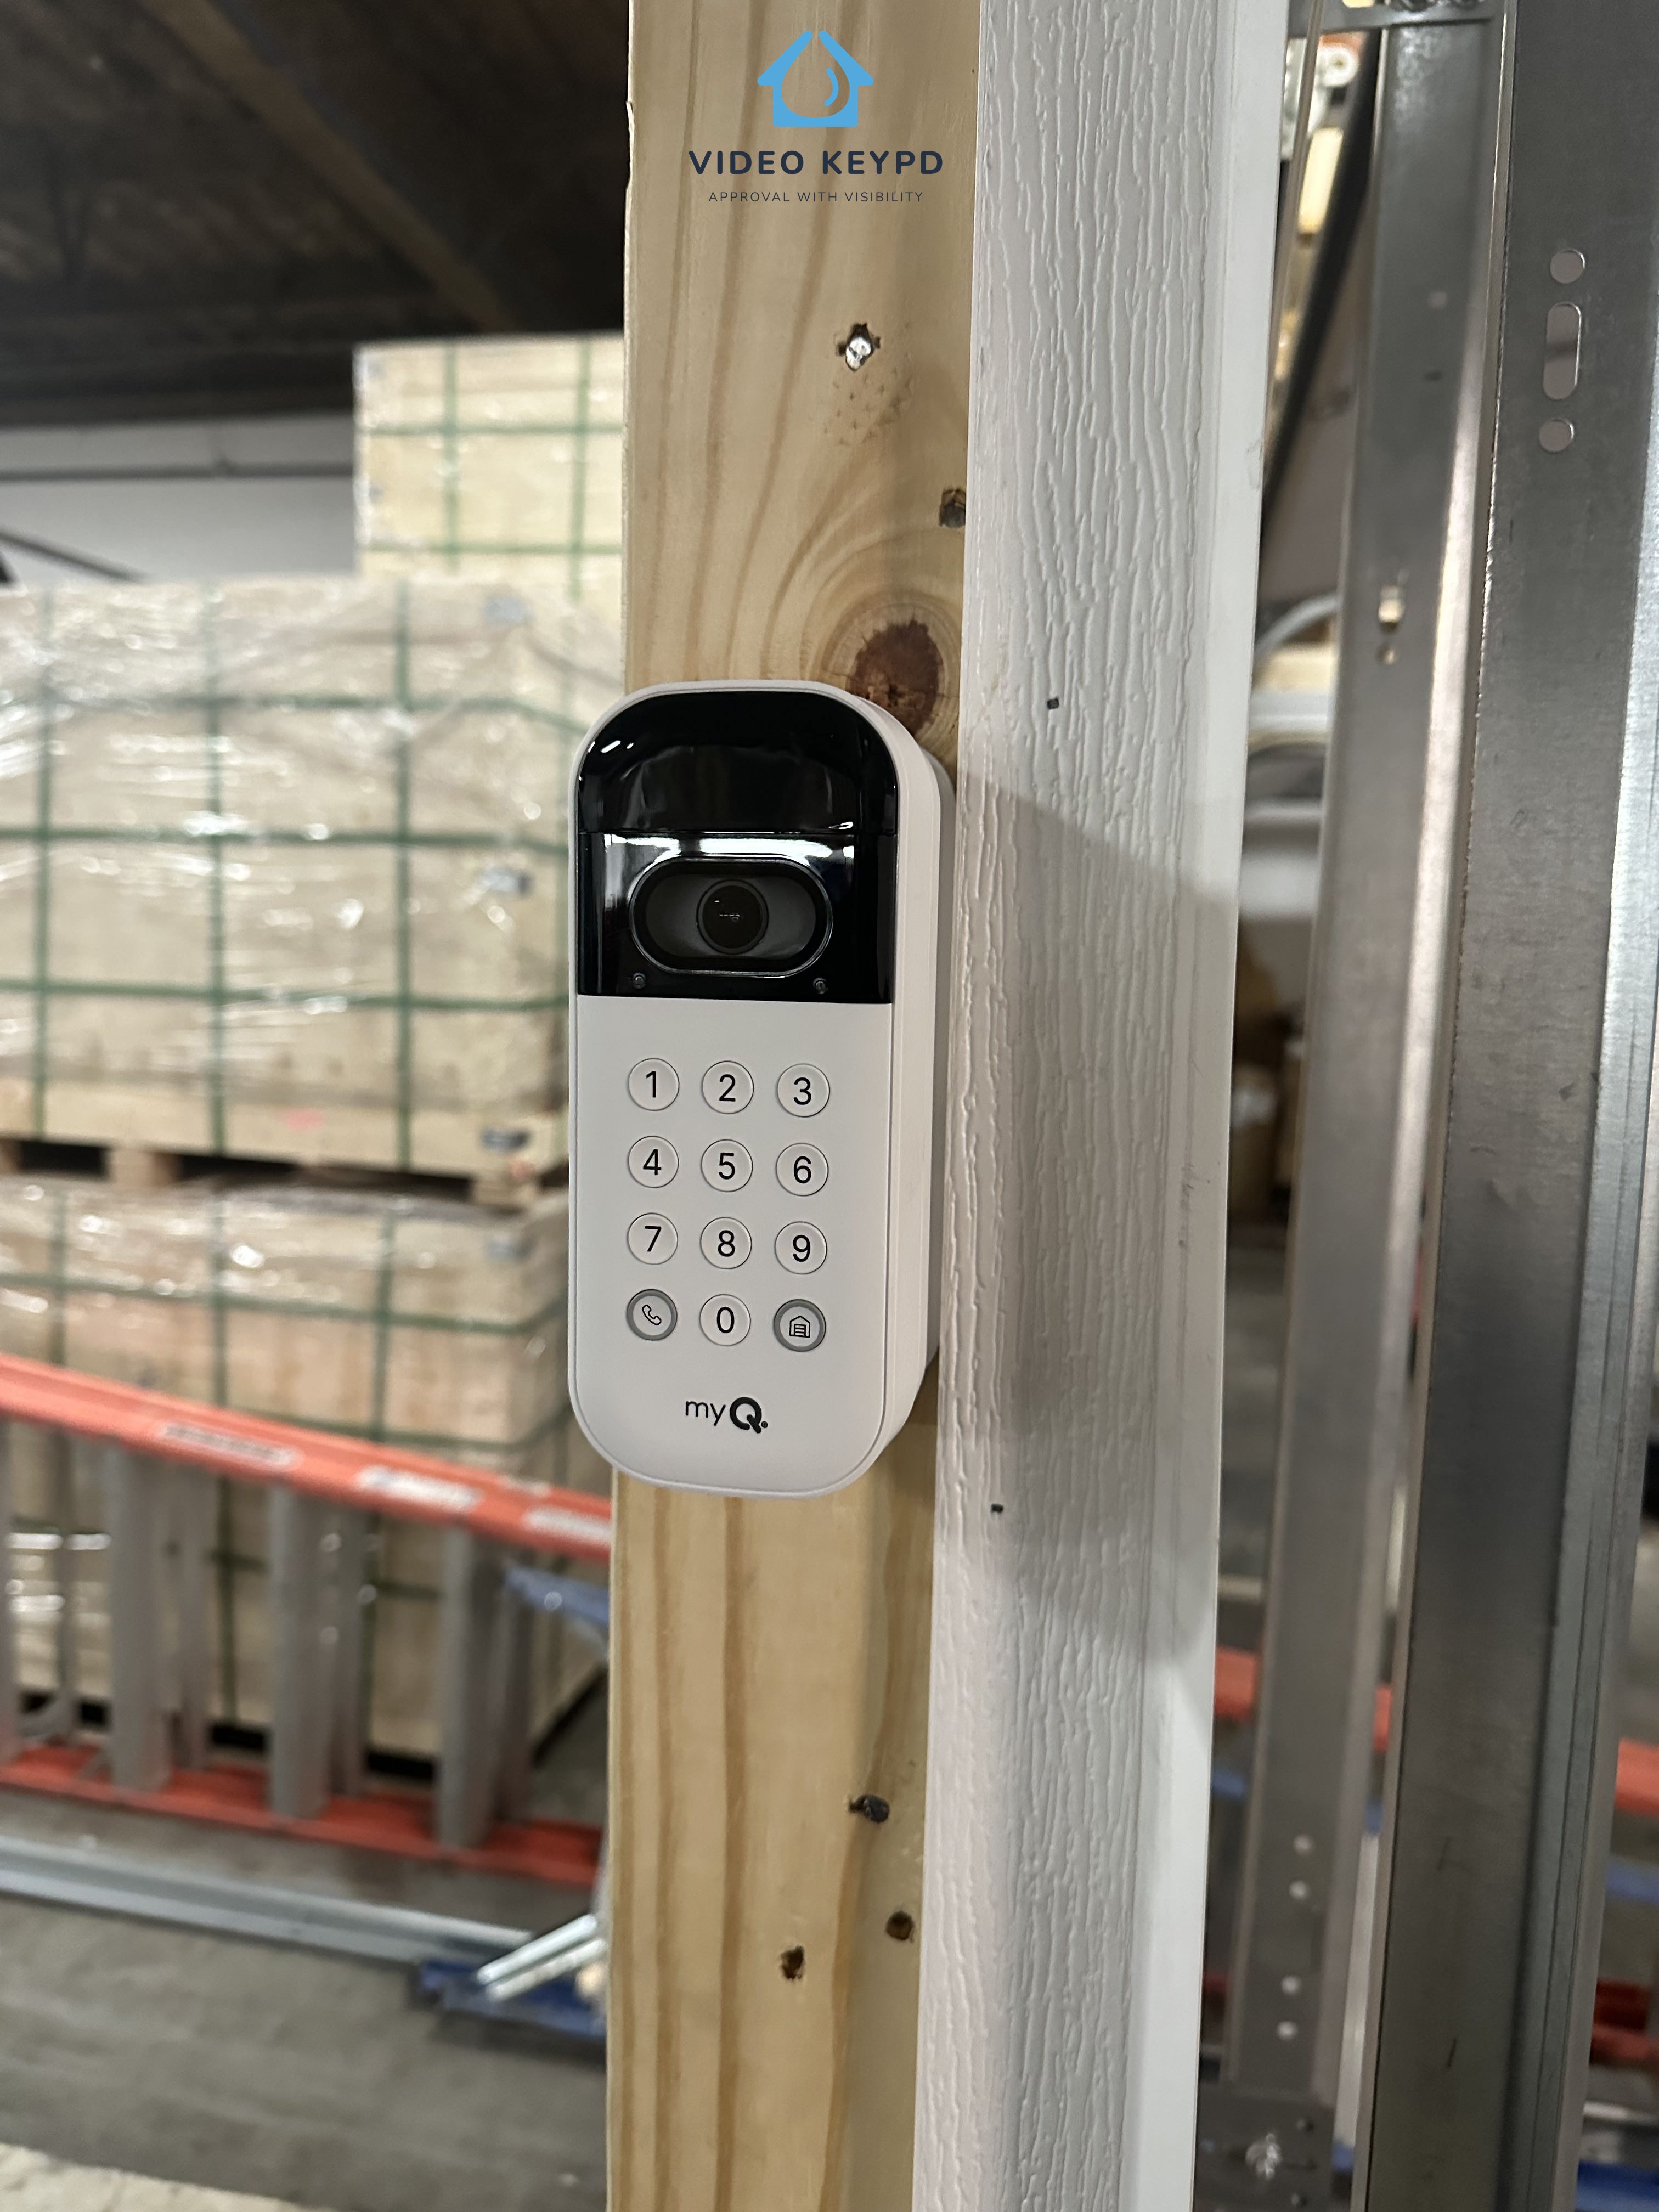
Mounting Bracket Installation
Choosing the Right Location
For optimal use, mount your Video Keypad at a height of at least 5 feet (1.5 meters) to keep it out of reach of small children. Consider the following factors when selecting the installation spot, focusing on both camera view and keypad accessibility:
- Visibility of other entry points to your home.
- Preference for viewing down the street or specific areas.
- Areas around your home with higher activity levels you wish to monitor.
- Convenience of keypad access for regular use.
Mounting Process
- Positioning the Bracket: Take the provided mounting bracket and use it as a guide to mark the drill points on your chosen location. Use a pen or pencil for this.
- Note on Existing Keypad Locations: If you’re replacing an existing keypad, be aware that the drill holes for the new mounting bracket might differ from the current setup.
Installing on Various Surfaces
For Stucco, Brick, or Concrete Surfaces:
- Drilling Holes: Use a 1/4” masonry drill bit to create holes in your chosen wall surface.
- Inserting Wall Anchors: Place the provided wall anchors into these holes. You can either push them firmly into position or gently tap them in with a hammer.
For Wood or Vinyl Siding:
- Wall anchors are not necessary for these types of surfaces. You can directly proceed to the next step of the installation without drilling for anchors.
Aligning the Bracket
- Choosing Orientation: Adjust the mounting bracket so the Video Keypad faces the desired direction. With the 20° mount, you can flip the bracket to alter the angle based on your environment. We suggest angling the keypad towards your driveway for the best view.
- Securing the Bracket: Attach the bracket to the wall using the two Mounting Screws and a Phillips screwdriver. Ensure the screws are driven into the wall or anchors (if used) until they are flush with the bracket.
Attaching the Video Keypad to the Bracket
- For 20° or 0° Mounts: Slide the top of your Video Keypad into the top ridges of the bracket, then press the bottom into place.
- For the Swivel Mount: Directly press the Video Keypad into the mount until it snaps in, aligning with the side ridges.
Making Adjustments
Removing the Keypad: To detach the Video Keypad from any bracket, hold it firmly from the bottom and gently pull out and upwards.
Securing the Keypad: Once the Video Keypad is in place, use the Phillips screwdriver to fasten the short security screw (provided) into the bottom of the device. This step is crucial for securing the keypad.
Important: Use only the short security screw included for this purpose. Using a different screw could potentially cause damage to your Video Keypad.
Operating Your Video Keypad
- Convenient Garage Door Activation: Input your assigned PIN and then press the ‘Home’ button to open the garage door.
- One-Touch Close: When your garage door is open, simply press the ‘Home’ button to close it.
- Emergency Alert and Video Access: Press the ‘Call’ button to send an alert through the app and activate real-time video streaming.
- Personalized Access: Manage up to 16 unique PIN codes via the app for family, friends, and guests, providing them access to open your garage door.
- Continuous HD Video Streaming: Enjoy around-the-clock HD video streaming with night vision capabilities and two-way audio.
- Custom Notifications and Settings: Tailor your notifications and tweak settings to your preference using the mobile app.
Exploring the Video Storage Plan
The Video Storage Plan is designed to record and store videos for up to 30 days. This feature is invaluable for keeping tabs on your garage area, especially for events you might have missed live.
Additional Features and Benefits:
- Advanced Capabilities: Enjoy enhanced functionalities like People Detection and Rich Notifications for deeper, actionable insights.
- Video Management: Effortlessly view, filter, download, and share your recordings directly through the app.
Pricing Details:
- Affordable Plans: Starting at just $3.99 USD per month, with additional savings available for annual subscriptions.
Getting Started:
- Free Trial: Your Video Keypad includes a complimentary 30-day trial of the plan.
- Subscription: You can subscribe to the Video Storage Plan anytime via the account settings in your app.
| Features | Already Included | Available With Subscription |
|---|---|---|
| Customizable PIN Codes | ||
| Video Calling | ||
| 2-Way Audio | ||
| Real-Time Video | ||
| Motion Sensing | ||
| Activity Alerts | ||
| Person Recognition | ||
| Recorded Video Log | ||
| Enhanced Alert Notifications |
12-Month Limited Warranty
Manufacturer assures the initial buyer of this product that it is free from material and manufacturing defects for a period of one year following the date of purchase.
This limited warranty is valid only for products bought from Seller or an authorized reseller in the United States or Canada. This is due to our inability to guarantee the quality of products sold by unauthorized sellers. Accordingly, warranty claims may be denied for products purchased from unauthorized sellers, including unauthorized online platforms.
For appropriate recycling and disposal of the battery, please consult the instructions on the battery label.
Troubleshooting Guide
Resetting Wi-Fi Connection
- Initiating Wi-Fi Reset: Press and hold the Reset Button for 10 seconds or longer. Release when the LED turns solid blue and then begins to blink slowly in blue.
- Connecting to a New Network: As soon as the LED starts blinking blue, open your app and follow the provided instructions to connect to a different Wi-Fi network.
Performing a Factory Reset
- Starting with Wi-Fi Reset: Follow the Wi-Fi reset steps mentioned above, waiting until the LED blinks blue.
- Completing the Factory Reset: While the LED is blinking blue, press and hold the Reset Button again for at least 10 seconds. Release when the LED turns solid magenta, which will then lead to the device’s boot sequence. This action will erase all settings on the device.
For Product Installation please visit www.veterangaragedoor.com
Chart
Compatibility Chart.
| Yellow Button 2011 – Current (Security+ 2.0) |
|
|---|---|
| Brand | Models |
| Chamberlain | B353, B373, B500, B503, B510, B550, B550C B730, B740, B750, B970, B1381, B2202, B2211T, B2212T, B2401, B2405, B4505T, B4545, B4603T, B4613T, B4643T, B6713T, B6753T, B6755, 6765, C203, C205, C253, C273, C450, C2102, C2202, C400, C410, C450, C455, C870, C2212T, C2405, 349544, 349544EV, D2101, HD220, HD220C, HD420EV, HD520EV, HD750WF, HD920EV, HD930EV, HD950WF, LW260C, LW2200 LW3000EV, LW5000EV, LW9000WF, PD220, PD222, PD612EV, PD752KEV, PD762EV, RJ020, RJ070, WD832KEV, WD850KEV, WD930EV, WD962KEV, WD962KPEV, WD962MLEV |
| LiftMaster | 8010, 8065, 8075, 8155, 8155W, 81550, 8160W, 8160WB, 8164W, 8165, 81600, 81602, 81650, 8165W, 83650-267, 8365-267, 8365-267W, 8355, 8355W, 8360, 8360W, 84501, 84504R, 84505R, 84602, 85503-267, 8557, 8557W, 8587, 85870, 8587W, 8500, 8500W, 8550, 8550W, 8550W-267, 85503, 84501, 84602, 87802, 87504-267, 98022 |
| Raynor | Admiral II, Airman II, Airman II with WiFi, Aviator II, Corporal II with WiFi, Pilot II, Corporal II, Prodigy II, Pilot II with WiFi, Prodigy II with Wifi, Ultra II, Ultra II with WiFi, Voyager, Sentinel, Sentinel™ 360, Sentinel™ III, ,Sergeant II |
| Craftsman | CMXEOCG471,CMXEOCG981, CMXEOCG231,CMXEOCG571, CMXEOCG771, CMXEOCG781 |
| Access Master | M885, M8856 |
| Australia | |
| Merlin | MJ3800MYQ, MS125MYQ, MS105MYQ, MR855MYQ, MS65MYQ, MR655MYQ, MT3850EVO, MR555MYQ, MT110MYQ, MT120EVOPS, MT60EVO, MT100EVO |
| Purple Button 2005 – Current (Security+ 315Mhz) |
|
|---|---|
| Brand | Models |
| Chamberlain | 248730, 48930D, 7520, 9950D DCG40D, CG42D, HD200D, HD400D, HD420D, HD422D, HD600, HD800D, HD900D, LW2000, LW3000, LW3500, PD210, PD210D, PD212D, PD300, PD432D, PD462D PD610D, PD612D, PD612KLD, PD752D, PD758D, WD822KD, WD832KD, WD952KD, WD952LD WD962KD |
| LiftMaster | 1345, 1346, 1355, 1356, 3110, 3130, 3220, 3240, 3245, 3255, 3265, 3280, 3500, 3575, 3585, 3595, 3800, 3800P, 3800PLD, 3850, ATS2113X, ATS2113X-CX, HCT501130, LGO50113R, LGO20113XR |
| Craftsman | 139.53997D, 139.53985DM, 139.53990DS, 139.5399011 |
| Red / Orange Button 1997 – 2005 (Security+ 390Mhz) |
|
|---|---|
| Brand | Models |
| Chamberlain | 2200, 4200, 4620, 4640, 6200, 7220, 7320, 7420, 7902, 8200, 9200, 9902, 9950, 9960,CG40, PD210, PD212, PD420, PD420-2, PDPD610, PD612, PD752, PD785S, WD912K, WD922K |
| LiftMaster | 985, 9851,1000SDR, 1200, 1240R, 1245R, 1246R, 1255R, 1256R, 1265, 1280R, 2000SDR, 2110, 2220, 2245, 2255, 2575, 2280, 2500, 2500B, , 2500D, 2580, 2589, 2265, 2565, ATS211R, ATS211X |
| Craftsman | 139.5399211, 139.53672, 139.53978SRT, 139.53995SRT, 139.53993D, 139.53992D, 139.53992, 139.53991, 139.53491SRT |
| Green Button 1993 – 1996 |
|
|---|---|
| Brand | Models |
| Chamberlain | 710WHC, 711WHC, 1100, 2100, 4100, 4600, 5100, 7200, 8100, 8100M, CSO |
| LiftMaster | ATS211, 215WD, 220WD, 315WD, 320WD, 1240, 1245, 1246, 1250, 1255, 1260, 1260LK, 1245LK, 1270, 1280, 1000SD, 2000SD |
Cost
Cost Details.
| Product Cost | $70-$120 |
|---|---|
| Price To Intall by Professional | $95-$145 |
| Installation Warranty | 60 Days to 1 Year |
| Total Product Installed Cost | $165 - $265 |
| Commercial/Residential | Residential |